How to Pass a DOT HazMat Inspection Without Stress
The thought of a hazardous materials (hazmat) inspection can make even experienced truck drivers break out in a sweat. In recent years the U.S. Department of Transportation (DOT) has increased its oversight of carriers transporting hazardous goods, and failing a compliance check can trigger fines, delays, or an Out‑of‑Service order that stops your business in its tracks. According to industry data the average penalty for failing a DOT inspection is around $851, but the true cost is much higher when you factor in lost revenue and tarnished safety scores. Fortunately, hazmat inspections don’t have to be stressful if you understand the process and prepare systematically. This detailed guide explains what inspectors look for, how to organize your documents and equipment, and why a calm, professional attitude is one of your greatest assets. By the time you finish reading you’ll have a step‑by‑step plan to pass a DOT hazmat inspection with confidence.
Understanding HazMat Inspections
What is a DOT HazMat inspection?
The Federal Motor Carrier Safety Administration (FMCSA) and Pipeline and Hazardous Materials Safety Administration (PHMSA) require special oversight for vehicles transporting explosives, flammables, radioactive materials, poisons and other dangerous goods. Inspections ensure that drivers are properly trained, paperwork is accurate, vehicles are mechanically sound, and cargo is packaged and secured according to stringent federal regulations. Inspectors may perform a Level I inspection, which is the most comprehensive check covering driver credentials, hours‑of‑service (HOS) records and a bumper‑to‑bumper mechanical assessment, or a Level VI inspection for highway‑route‑controlled quantities of radioactive material. Less intensive Level II and III checks focus on paperwork and driver qualifications.
Hazmat inspections often occur at weigh stations or roadside checkpoints but can also be triggered by routine carrier audits or accident investigations. The goal is to prevent spills, fires and exposures that endanger the public and environment. Regulators pay close attention to shipping papers, placards and container integrity because mistakes can have catastrophic consequences.
Consequences of failing an inspection
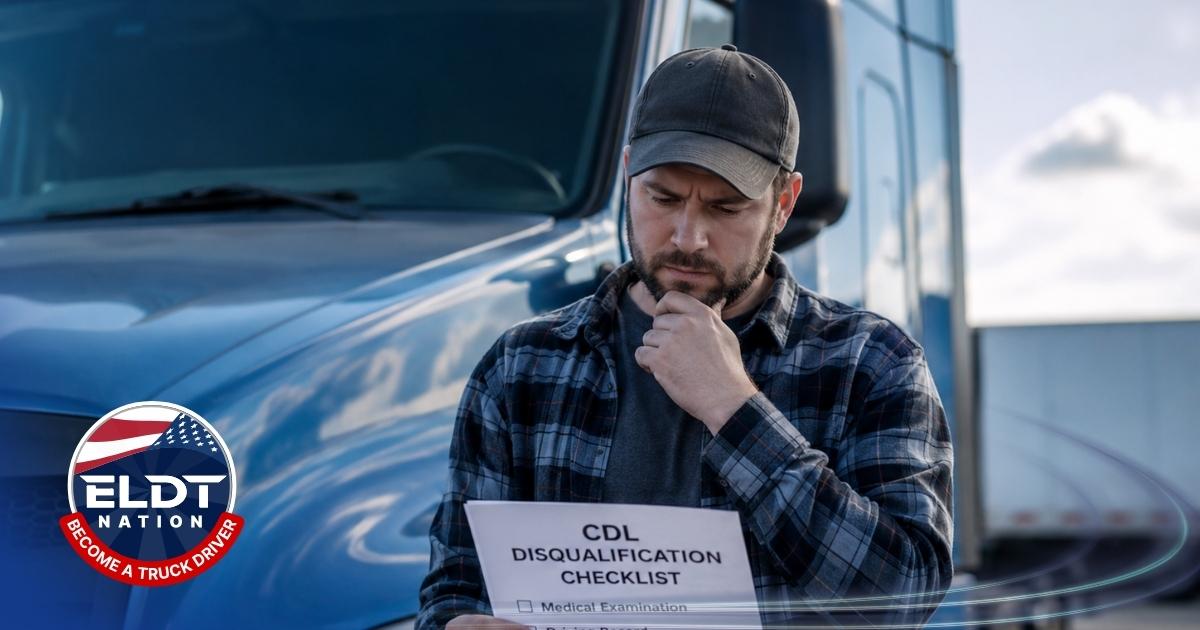
Failing a hazmat inspection can mean different things depending on the violation. Minor paperwork errors may result in citations or warnings, while major defects—such as leaking containers or falsified records—can lead to immediate Out‑of‑Service orders that ground your vehicle until the problem is fixed. Repeated violations can harm your CSA (Compliance, Safety, Accountability) score, increase insurance premiums, and jeopardize your ability to obtain hazmat endorsements. In severe cases the DOT can revoke a carrier’s operating authority. Taking the time to prepare thoroughly is less costly than dealing with fines and reputational damage.
Pre‑Inspection Preparation
Preparation is the single most important factor in passing a hazmat inspection. When drivers and fleet managers adopt a systematic approach—organizing paperwork, inspecting equipment and training personnel—the inspection becomes a formality rather than an ordeal. The following sections provide a comprehensive pre‑inspection checklist.
Organize required documentation
Inspectors begin by asking for documentation proving that the driver is qualified to transport hazardous materials and that the cargo is properly described. Have these documents readily accessible in a binder or digital folder:
- Driver’s license and hazmat endorsement – You must carry a current commercial driver’s license (CDL) with a hazardous materials endorsement. Hazmat endorsements require security threats assessments and regular renewal.
- Medical examiner’s certificate – A valid DOT medical card verifies that you meet physical requirements. Keep copies of any waivers (such as a Skill Performance Evaluation certificate) if applicable.
- Shipping papers and bills of lading – Hazardous materials must be described using the proper shipping name, four‑digit UN/NA number, hazard class or division, packing group, and quantity in weight or volume. The papers must include an emergency response telephone number that is monitored 24/7 by someone knowledgeable about the cargo. Place the current shipping papers within arm’s reach of the driver at all times. When not at the wheel secure them in the door pocket or on the driver’s seat.
- Placard reference chart – If transporting multiple hazard classes, carry a placard chart or the Emergency Response Guidebook so you can verify that placards and labels match the material on board. Placards must be displayed on all four sides of the vehicle and be legible from 50 feet away.
- Hazmat security plan and training records – Companies transporting certain quantities of explosives, flammable gases or toxic materials must develop a security plan that addresses personnel security, unauthorized access, en route security, and security awareness training. Drivers should be able to produce training certificates confirming they have been instructed on hazard communication, response procedures, and company policies.
- Vehicle inspection reports – Maintain recent pre‑trip and post‑trip inspection reports, proof of periodic maintenance and any repairs performed. Inspectors want to see that you systematically monitor brakes, tires, lights, and other safety systems.
- Hours‑of‑Service logs – Whether using paper logs or an electronic logging device (ELD), have current and previous seven days of HOS records available. Inspectors check that you are operating within the 14‑hour duty window and taking the required 30‑minute break after eight hours of driving.
- Insurance documents – Carry proof of liability and cargo insurance that meets or exceeds the minimum coverage required for your cargo category. Hazardous materials often require higher coverage limits than general freight.
By assembling these documents ahead of time you minimize fumbling at the inspection site. Keeping them in a dedicated folder or digital tablet ensures that nothing gets lost or damaged during transit.
Conduct a thorough mechanical inspection
Before any trip you should perform a pre‑trip inspection and repeat critical checks periodically during your route. Mechanical problems are a leading cause of violations during hazmat inspections. Follow this systematic process:
- Brakes – Inspect both air and hydraulic systems for leaks, wear and proper adjustment. Examine brake drums or rotors, pads or linings, hoses and connections. For tractor‑trailer combinations perform a tug test to ensure the trailer brakes apply correctly. Check the low‑air pressure warning system.
- Tires and wheels – Check tread depth (minimum 4/32 inch on steer tires and 2/32 inch on others), inflation pressure and sidewall condition. Look for cuts, bulges or exposed cords. Ensure lug nuts are tight and rims are free from cracks.
- Lights and electrical – Test headlights, tail lamps, brake lights, turn signals, marker lights and warning lights. Clean lenses and replace burnt bulbs. Check that reflectors are intact and wiring is secured to prevent chafing.
- Steering and suspension – Inspect the steering gearbox for leaks, check that steering column joints are lubricated, and ensure there is no excessive play in the steering wheel. Examine suspension components like springs, hangers, U‑bolts and shock absorbers for cracks, wear or misalignment.
- Windshield, mirrors and wipers – Make sure the windshield is clean, free of cracks and provides an unobstructed view. Adjust mirrors for proper visibility and test the washer fluid and wipers. Damaged wipers can obscure vision during rain and result in a violation.
- Horn and seat belt – Check that the horn functions properly and the seat belt latches securely. Inspectors can issue an automatic fail if a driver is not wearing a seat belt when they pull you over.
- Emergency equipment – Verify that you have the required emergency response equipment: at least one (often two) 10‑B:C fire extinguisher securely mounted and fully charged; three reflective triangles or flares; a spare fuse kit; spill control materials appropriate for your cargo such as absorbent pads or booms; personal protective equipment (gloves, goggles, respirator); and a flashlight with extra batteries.
- Leaks and container integrity – Walk around the vehicle to look for any signs of leaking fuel, oil, coolant or hazmat. Inspect cargo tanks, drums or cylinders for dents, rust, corrosion or improper closures. Make sure fittings and valves are capped and oriented correctly, and confirm that pressure relief devices are in working order. If transporting radioactive or cryogenic materials, check that specialized containment systems (e.g., pressure gauges, radiation shields, temperature indicators) are intact.
Document your findings on a pre‑trip inspection checklist. Modern fleet management systems allow you to create digital checklists with photo attachments and auto‑timestamped signatures. Using a mobile app such as SafetyCulture’s iAuditor helps standardize inspections across your fleet and provides a record for auditors if questions arise.
Verify cargo securement and placarding
Hazardous materials require not only secure packaging but also proper segregation, orientation and documentation. Inspectors will scrutinize the cargo area for these elements:
- Blocking and bracing – Use appropriate dunnage, straps, chains or load bars to prevent cargo from shifting. Heavy drums should be blocked to prevent rolling, and cylinders must be secured in an upright position. For explosives, ensure that spark‑producing tools are stored separately and that bulkheads or partitions are installed as required.
- Separation of incompatible materials – The Hazardous Materials Table (49 CFR 172.101) provides segregation rules to prevent dangerous reactions. For example, poisons must be separated from foodstuffs and flammable gases from oxidizers. Plan your load so that incompatible materials are not adjacent or loaded above each other.
- Container closures and packaging – Check that closures are tight, lids are sealed and gaskets are in good condition. Verify that orientation arrows on boxes or drums are pointing up and that packages show no signs of leakage. Bulk tanks must be closed and sealed; valves and vents should be locked or tamper‑evident.
- Placards and markings – Hazmat placards must be affixed to all four sides of the vehicle and correspond to the highest hazard class present. Placards for Class 1 explosives include compatibility group letters (e.g., 1.1D), while Class 2 gases require hazard division numbers and UN ID numbers. Remove outdated placards from previous loads to avoid confusion. Ensure that identification numbers on orange panels match the shipping papers. Inspectors often cite carriers for placards that are faded, torn or obscured by dirt, so clean them regularly.
If you are transporting radioactive material, additional markings such as “Radioactive – III” labels and transport indexes must be displayed. For cargo requiring a Level VI inspection (highway‑route‑controlled quantities), your vehicle must also carry route plans and special shipping papers with security seals.
.jpg)
Plan your route and timing
Inspections are more likely during national enforcement initiatives such as the annual International Roadcheck in May and the Operation Safe Driver Week in July. However, state police and DOT officers conduct roadside checks year‑round. Plan your trip so that you have plenty of time to reach your destination without rushing. Rushing increases the temptation to skip pre‑trip checks or exceed hours‑of‑service limits, both of which raise red flags. Avoid peak rush hours when possible; heavy traffic may cause you to commit unintentional violations such as lane encroachment or improper turns.
Also, research any route restrictions and tunnel restrictions for your cargo. Some tunnels and bridges prohibit certain hazard classes, and local jurisdictions may require permits for explosive or radioactive materials. The U.S. DOT mobile app and state DOT websites provide up‑to‑date route information.
During the Inspection
When you pull into an inspection station or are stopped roadside, your demeanor plays a big role in how smoothly the process unfolds. Follow these guidelines:
- Stay calm and polite – Treat inspectors with respect and refrain from arguing. Answer questions honestly and concisely. Inspectors have broad authority to examine your documents and vehicle; a cooperative attitude often results in a quicker inspection.
- Provide documentation promptly – Hand over your driver’s license, medical card, shipping papers, and logbook without delay. Keep them in an organized binder or digital tablet so you don’t waste time flipping through loose papers.
- Accompany the inspector – Walk around the vehicle with the inspector as they check the tires, brakes, lights and cargo area. This shows that you take safety seriously and allows you to answer questions about repairs or equipment. Do not offer to fix a defect on the spot unless asked; inspectors may view unauthorized repairs as tampering.
- Know your cargo – Be prepared to describe the hazard classes you are carrying, the number of packages or tanks, and any special handling requirements. The inspector may ask what the emergency response guidebook entry is for your UN number. If you are unfamiliar with your cargo, they may question whether you received proper training.
- Document inspection results – If the inspector issues a citation or Out‑of‑Service order, obtain a copy of the report. Understand what violations were cited and the timeline for repairs or corrective actions. Take photos of any alleged defects if you disagree with the findings. Once repairs are complete, submit proof to the agency and schedule a re‑inspection if necessary.
After the Inspection
Passing a hazmat inspection doesn’t mean you can rest on your laurels. Use the inspector’s feedback to refine your procedures. If they noted minor paperwork issues or recommended equipment upgrades, address those items immediately. File the inspection report in your compliance records and share lessons learned with other drivers and dispatchers. Continuous improvement prevents complacency and ensures that your next inspection goes even more smoothly.
If you failed an inspection, resist the urge to panic. Most violations can be corrected quickly, such as replacing a missing placard or fixing a light. However, some issues like leaking cargo tanks may require the vehicle to be towed to a repair facility. The key is to respond promptly, maintain documentation of repairs, and communicate with the enforcement agency. Your goal is to return to service as soon as possible while demonstrating a commitment to safety.
Tips for a Stress‑Free HazMat Inspection
In addition to mechanical and documentation preparations, the following strategies help reduce anxiety and set you up for success:
Implement digital inspection tools
Paper checklists are easy to lose or misfile, and deciphering chicken‑scratch handwriting during an audit is frustrating. Many carriers have adopted digital inspection tools that run on smartphones or tablets. SafetyCulture’s iAuditor, Fleetio, and similar apps allow you to customize pre‑trip checklists, upload photos of defects or repairs, and automatically generate reports with timestamps and GPS coordinates. These tools provide an audit trail that inspectors appreciate and reduce the risk of overlooking a critical item.
Train and retrain your drivers
Federal regulations require initial and recurrent hazmat training every three years, but in practice you should treat training as an ongoing process. Review changes to the Hazardous Materials Regulations (HMR) when they occur and incorporate lessons learned from incidents or inspections. Use tabletop drills to practice filling out shipping papers, selecting placards, and responding to hypothetical spills. Consider partnering with certified training providers who specialize in hazmat awareness, security and function‑specific tasks.
Maintain a culture of safety
Drivers are less likely to cut corners if your company prioritizes safety over productivity. Set realistic delivery schedules that allow time for pre‑trip inspections. Encourage drivers to report mechanical issues promptly without fear of retaliation. Post checklists and regulatory updates in common areas and discuss them during safety meetings. Recognize employees who consistently adhere to procedures and pass inspections without violations.
Keep the vehicle clean
It may seem superficial, but a clean truck reflects a conscientious operator. Wipe down the dash, keep the cab organized, and wash the exterior regularly. Inspectors often associate neatness with attention to detail and may be less suspicious of sloppy paperwork if the vehicle looks cared for. Cleaning also helps you spot leaks or damage that could otherwise go unnoticed.
Stay updated on regulatory changes
Hazmat regulations evolve to address new technologies, materials and threats. Recent updates include digital recordkeeping requirements, revised hazard classes for lithium batteries and infectious substances, and increased registration fees for certain carriers. Subscribe to FMCSA and PHMSA newsletters, attend webinars, and consult industry associations to stay informed. The more current your knowledge, the less likely you are to inadvertently violate a rule.
Required Documents and Their Purpose
Below is a table summarizing the critical documents you must carry for a hazmat inspection and why each is necessary. Keeping these papers organized eliminates confusion when an inspector requests proof of compliance.
If you are preparing for your hazmat endorsement or looking to elevate your safety program, ELDT Nation offers comprehensive online courses and resources designed specifically for commercial drivers. Their training covers everything from general hazmat awareness to function‑specific tasks and security planning. Visit ELDT Nation today to enroll in a course and ensure you are ready for your next inspection. Invest in your education now and drive with peace of mind knowing you meet and exceed regulatory standards.
Related posts